服务器 :windows server2008 R2
反向代理 :nginx 1.15.1 for window 64位
数据库:mongodb 4 64位
使用框架express
首先下载nodejs 在官网或者中文网下载都可以 https://nodejs.org/zh-cn/
然后将写好的项目打包成zip 上传 一定要带上 package.json
这样做可以使用npm install 直接将所有的资源全部加载 。以防出现module 找不到;
注意一点:下载mongodb时 在最后下载时 一定要去掉 可视化管理工具下载
不然你会等很久 如果网不好可能就卡死了。 这时候 需要你关闭下载的进程
如果找不到只能重新启动服务器。
如果没有看懂。直接百度mongodb下载卡死 就好了。
npm是node自带的包管理器。
将node部署到服务器上运行时 。我们需要在

因为我们配置nginx时 ,是需要修改localhost的 所有我们需要写上'127.0.0.1';
在操作数据时,我们也应该修改成

否则会导致数据库链接失败。
接下来我们配置nginx服务
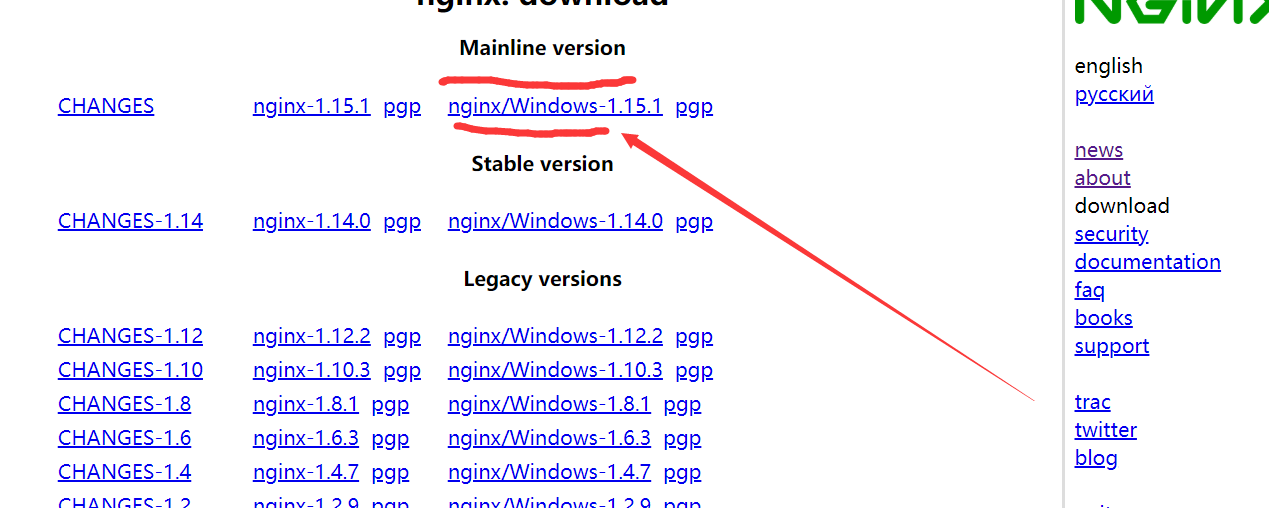
首先下载nginx http://nginx.org/en/download.html 下载最新版本 注意是window版

然后安装nginx。将zip包进行解压 切记不要用鼠标直接去运行nginx.exe。
我在这里需要打开cmd进入改目录下 然后 输入 start nginx或者 start nginx.exe 去运行。
只运行一次就好。如果多次运行会开启多个服务,这是一个大坑。
多开了就任务管理器关掉就好了。
不出意外的话。应该是这样的画面

他和node不一样 运行没有报错就说明已经开启了 但是还是会切回命令行模式。这是正常的。
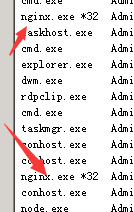
你如果为了确认是否开启nginx 你可以打开任务管理器在进程里查看

有2个nginx就是正常启动了 ,这时候你可以访问localhost:8080
出现了welcome to nginx 说明启动运行成功。
反向代理配置:nginx.conf文件 这里配置的是 http服务 https 只需要改成 443 端口 就可了
#user  nobody;
worker_processes  1;#error_log  logs/error.log;
#error_log  logs/error.log  notice;
#error_log  logs/error.log  info;

#pid        logs/nginx.pid;

events {
worker_connections  1024;
}http {
include       mime.types;
default_type  application/octet-stream;

#log_format  main  '$remote_addr - $remote_user [$time_local] "$request" '
#                  '$status $body_bytes_sent "$http_referer" '
#                  '"$http_user_agent" "$http_x_forwarded_for"';#access_log  logs/access.log  main;

sendfile        on;
#tcp_nopush     on;#keepalive_timeout  0;
keepalive_timeout  65;#gzip  on;upstream nodejs {server 127.0.0.1:3000;  #你配置的端口keepalive 64;}server {listen       80;server_name  www.xiaobaiblog.cn; #你需要解析的域名 location / {proxy_set_header X-Real-IP $remote_addr;proxy_set_header X-Forwarded-For $proxy_add_x_forwarded_for;proxy_set_header Host  $http_host;proxy_set_header X-Nginx-Proxy true;proxy_set_header Connection "";proxy_pass      http://nodejs;
}#error_page  404              /404.html;
# redirect server error pages to the static page /50x.html
    #error_page   500 502 503 504  /50x.html;location = /50x.html {
        root   html;}# proxy the PHP scripts to Apache listening on 127.0.0.1:80##location ~ .php$ {#    proxy_pass   http://127.0.0.1;
    #}# pass the PHP scripts to FastCGI server listening on 127.0.0.1:9000##location ~ .php$ {#    root           html;#    fastcgi_pass   127.0.0.1:9000;#    fastcgi_index  index.php;#    fastcgi_param  SCRIPT_FILENAME  /scripts$fastcgi_script_name;
    #    include        fastcgi_params;#}# deny access to .htaccess files, if Apache's document root# concurs with nginx's one##location ~ /.ht {
    #    deny  all;#}
}# another virtual host using mix of IP-, name-, and port-based configuration
#
#server {
#    listen       8000;
#    listen       somename:8080;
#    server_name  somename  alias  another.alias;#    location / {
#        root   html;
#        index  index.html index.htm;
#    }
#}# HTTPS server
#
#server {
#    listen       443 ssl;
#    server_name  localhost; #你的域名 #    ssl_certificate      cert.pem;
#    ssl_certificate_key  cert.key;#    ssl_session_cache    shared:SSL:1m;
#    ssl_session_timeout  5m;#    ssl_ciphers  HIGH:!aNULL:!MD5;
#    ssl_prefer_server_ciphers  on;#    location / {
#        root   html;
#        index  index.html index.htm;
#    }
#}
}

在云解析 将域名设置指向你的公网ip就可以了
此时你的网站应该是可以访问了 。